Add Material
Material can be added to a work order to track its usage and cost.
- Open a work order.
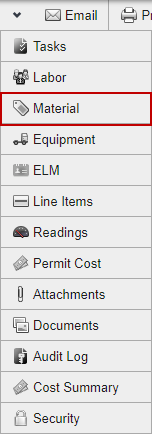
- Click Material from the functions drop-down list.
- Select Actual at the top of the Material panel.

- If you are using Storeroom, select the Storeroom that you wish to issue material from. If you are not using Storeroom, this option is not shown.
The material shows in a list in the Material/Entity/Task panel. The Search By drop-down list filters the list. Your selection is remembered, so any time you return to this page the Search By field is set to whatever you selected last.
- Select Name to search the list by keyword. Once you select Name, the page reloads. Enter the keyword in the Keyword field and click Find. Select the desired material by selecting the check box next to the UID.
- Select Predefined to view the estimated material that the administrator has configured for all work orders of this type. Once you select Predefined, the page reloads and the predefined material shows. Select the desired material by selecting the check box next to the UID.
 TIP: You can also add predefined material to the work order by transferring it from estimated to actual. See Move Estimated Material to Actual for more information.
- Select Crew to view material based on crews that are viewable to the Submit To user. Once you select Crew, the page reloads and a Select Crew drop-down list shows. Select the crew from that list to view material assigned to that crew. Select the desired material by selecting the check box next to the UID.
- Select My Crew to view material based on the crews that are viewable to you. Once you select My Crew, the page reloads and a Select My Crew drop-down list shows. Select the crew from that list to view material assigned to that crew. Select the desired material by selecting the check box next to the UID.
- Select Hierarchy to view the material organized in a hierarchy that is configured by the administrator. Once you select Hierarchy, the page reloads and the domains show in a drop-down list. Select a domain to view the hierarchy configured for that domain. Click the plus icon next to a hierarchy category to expand it. Click the desired material to highlight it, then click Select at the top of the panel.
 NOTE: Once you select an option from the Search By drop-down list and the page reloads, the option you selected is no longer visible but is still selected.
- Select the material using one of the options above.
- If you wish to associate the material to an asset, select the Assets option button and then select the asset in the bottom half of the Material/Entity/Task panel. If desired, you can click Highlight Selected Assets to highlight it on the map.
- If you wish to associate the material to a task, select the Task option button and then select the task in the bottom half of the Material/Entity/Task panel.
NOTE: If you choose to associate the material with a task, the date and time associated with the task automatically populates in the Date field of the Details panel. This can be changed if needed.
- Enter information in the Details panel or the Contractor Material panel if the material is from a contractor.
NOTE: If you are adding material provided by a contractor, enter the total cost of the material in the Cost field. The system does not calculate the cost by the number of Units entered. For example, if a contractor provided 5 units of a material at a cost of $20 per unit, enter 100 in the Cost field.
- Click Add in the respective panel.

NOTE: If you are using Storeroom, you cannot add details to the material on this page. Details must be added in Storeroom.

